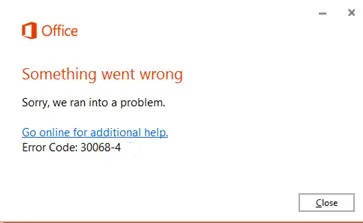
Error code 30068-4 is a common issue that Microsoft Office users encounter when they are trying to install or update their Office applications. This error usually appears when there is a problem with the installation process, and it prevents users from completing the installation or update process.
There are several reasons why you might encounter error code 30068-4. Some of the most common causes include issues with the network connection, problems with the Office installation files, conflicts with other software on your computer, or corrupted Windows system files.
If you are experiencing error code 30068-4, there are a few steps you can take to resolve the issue. Here are some troubleshooting tips to help you get started:
Step 1: Check your internet connection:
Make sure that you have a stable and active internet connection. Poor or unstable internet connectivity can cause the Office update process to fail.
To check your internet connection, open a web browser and try to visit a website. If you can’t access any websites, you may need to troubleshoot your internet connection.
Step 2: Disable your antivirus software temporarily:
Sometimes antivirus software can interfere with the Office update process, causing it to fail. You can temporarily disable your antivirus software while you install or update Office. To disable your antivirus software, follow these steps:
Open the antivirus software on your computer.
Look for an option to disable or turn off the antivirus software.
Follow the prompts to disable the antivirus software.
Step 3: Run the Office Repair Tool:
The Office Repair Tool can help fix common installation and update issues with Office. To run the Office Repair Tool, follow these steps:
Open the Control Panel on your computer.
Click on Programs and Features.
Locate Microsoft Office in the list of installed programs and click on it.
Click on the Change button at the top of the window.
Select the option to Repair the installation and click on Continue.
Follow the prompts to complete the repair process.
Step 4: Remove and reinstall Office:
If the previous steps do not resolve the issue, you may need to remove and reinstall Office. To do this, follow these steps:
Open the Control Panel on your computer.
Click on Programs and Features.
Locate Microsoft Office in the list of installed programs and click on it.
Click on the Uninstall button at the top of the window.
Follow the prompts to uninstall Office.
Restart your computer.
Download and install Office from the Microsoft website.
Follow the prompts to complete the installation process.
Repair Microsoft Office:
You can try repairing your Microsoft Office installation to fix any corrupted files that might be causing the error.
To do this, go to the Control Panel
Select Programs and Features
Locate Microsoft Office and
Click on Change.
Select Repair and follow the on-screen instructions.
Run a System File Checker (SFC) scan:
Use the SFC tool to scan and repair any corrupted system files that might be causing the issue.
To do this, open Command Prompt as an administrator
Type “sfc /scan now”
Press Enter.
Wait for the process to complete.
Update Windows:
Make sure that your Windows operating system is up to date, as outdated software can cause conflicts and errors.
Go to Settings > Update & Security > Windows Update, and then click on Check for updates.
Disable startup programs:
Startup programs can also interfere with the Office installation process.
To disable startup programs, Go to the Task Manager,
Select the Startup tab,
Disable any programs that aren’t necessary.
Perform a clean boot:
A clean boot is a troubleshooting technique that disables all startup programs and services.
To perform a clean boot:
Press Windows + R to open the Run dialog box.
Type “msconfig” and press Enter.
In the System Configuration window, Select the Services tab.
Check the “Hide all Microsoft services” box and click on Disable all.
Next, select the Startup tab, and
Click on Open Task Manager.
Disable any startup programs that aren’t necessary.
Close the Task Manager and click on OK in the System Configuration window.
Restart your computer and try to install Office again
Registry repair steps:
Before proceeding with any registry repair steps, it’s important to note that editing the registry can be risky and can potentially cause system errors or even render your system unusable. It’s recommended that you create a backup of your registry before attempting any repairs.
That said, here are the steps for repairing your registry:
Step 1: Open the Registry Editor
Press the Windows key + R on your keyboard to open the Run dialog box
Type in “regedit” and press Enter
Click “Yes” if prompted by User Account Control
Step 2: Identify the problem
Navigate to the part of the registry that is causing the issue
Look for any entries that are causing the problem, such as missing or invalid keys, values or data
Make a note of the location and details of the problem entry
Step 3: Backup the registry: Click on “File” in the Registry Editor menu
Select “Export”
Choose a location to save the backup file
Enter a name for the backup file
Click “Save”
Step 4: Fix the problem: Right-click on the problem entry
Select “Delete” to remove the entry entirely
Alternatively, you can modify the entry to correct the issue
Step 5: Close the Registry Editor
Click “File” in the Registry Editor menu
Select “Exit”
Step 6: Restart your computer
Restart your computer to apply the changes to the registry
In summary, the steps for repairing your registry involve opening the Registry Editor, identifying the problem, creating a backup, fixing the problem, closing the editor, and restarting your computer. However, it’s important to note that registry repair can be risky and should be done with caution.